
How to Repot Houseplants Safely Step by Step
A plant that suddenly dries out, tips over, or sends roots circling above the soil is not asking for a bigger pot immediately. It is asking for a closer look. Knowing how to repot houseplants safely helps you refresh tired soil and give roots room to grow without turning a healthy plant into a stressed one.
Repotting is one of the simplest ways to keep indoor greenery looking its best, but timing and technique matter. A pot that is too large can hold excess moisture around the roots, while rough handling can cause transplant shock. With the right supplies and a calm approach, you can give your plant a clean, comfortable new start.
Know When Your Houseplant Needs Repotting
Most houseplants need repotting every one to two years, though fast-growing plants may need attention sooner. Spring and early summer are usually the easiest times because plants are actively growing and can recover more quickly. If your plant is healthy and growing steadily in winter, it is often better to wait until brighter, warmer months before making a major change.
Look for roots growing through the drainage hole, wrapping tightly around the root ball, or pushing the plant upward from the pot. Water that rushes straight through the soil can also point to compacted soil or a root-bound plant. Slow growth, pale leaves, and frequent wilting may be related to the roots, but check light, watering, and pests before assuming repotting is the answer.
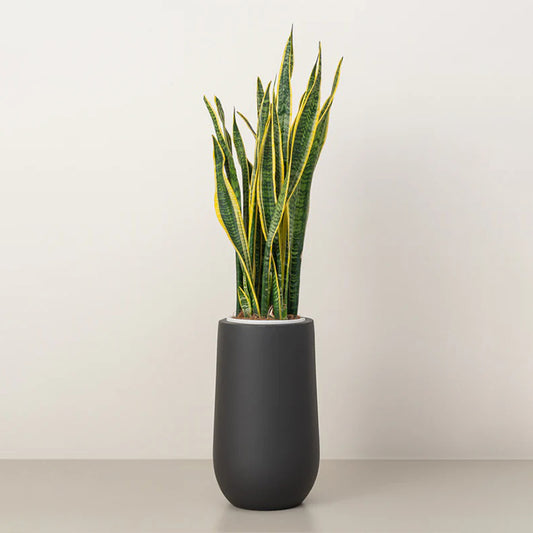
Not every plant needs a larger container. A mature snake plant, ZZ plant, or lucky bamboo may be happiest in its current pot for longer than a fast-growing monstera or bird of paradise. If the plant has room for roots and the soil still drains well, a simple top-up of fresh soil may be all it needs.
Gather What You Need Before You Start
Set up your workspace before removing the plant from its pot. A table covered with newspaper, a tray, or an old towel makes cleanup easier and keeps loose soil off floors and furniture. You will need a new pot with drainage holes, fresh potting mix suited to your plant, clean pruning shears, and a watering can.
For most houseplants, choose a new pot that is 1 to 2 inches wider than the current one. Larger statement plants can sometimes move up 2 to 3 inches, but avoid jumping to an oversized planter. Extra soil stays wet longer than the roots can use it, increasing the chance of root rot.
Choose soil for the plant rather than relying on one mix for every variety. A standard indoor potting mix works well for many tropical foliage plants. Cacti, succulents, and snake plants need a faster-draining mix, while moisture-loving plants benefit from a mix that holds water without becoming dense. Decorative pots without drainage can still be used as cachepots: keep the plant in a nursery pot with holes inside the decorative container.
How to Repot Houseplants Safely Without Damaging Roots
Water the plant lightly a day before repotting if the soil is very dry. Slightly moist soil usually releases from the pot more easily and helps roots stay together. Do not repot when the soil is soaking wet, since heavy, muddy soil can pull on delicate roots.
Lay the pot on its side, support the base of the plant with one hand, and gently slide it out. If it resists, tap the sides and bottom of the pot. For flexible nursery pots, squeeze the sides. Avoid pulling the plant by its leaves or stems, especially with trailing plants, fiddle leaf figs, and plants with soft new growth.
Once the root ball is out, inspect it closely. Healthy roots are generally firm and light-colored, tan, or white, depending on the plant. Roots that are black, mushy, hollow, or smell unpleasant should be trimmed away with clean shears. If the roots are densely circling the pot, gently loosen the outer layer with your fingers. You do not need to break apart a healthy root ball completely.
A few roots may snap during the process, and that is usually not a problem. The goal is not to make the roots look perfect. The goal is to remove damaged material, loosen severe circling, and place the plant in fresh, well-draining soil with minimal stress.
Position the Plant at the Right Height
Add a small layer of fresh potting mix to the bottom of the new pot. Place the plant in the center and check the height before filling around it. The top of the existing root ball should sit about an inch below the rim of the pot, leaving enough space for watering.
Keep the plant at the same soil level it had before. Burying stems too deeply can lead to rot, while planting too high leaves roots exposed. Once the level looks right, fill the gaps around the root ball with fresh soil.
Use your fingers to settle the soil gently. Pressing too firmly removes air pockets but can also compact the mix and reduce drainage. The soil should support the plant without feeling hard like packed dirt. For tall plants that lean, a stake can provide temporary support while roots settle into their new space.
Water Carefully After Repotting
Give the plant a thorough drink after repotting, allowing water to run through the drainage holes. This helps the fresh soil settle around the roots. Empty any water that collects in the saucer or outer cachepot so the plant is not sitting in moisture.
There are exceptions. If you removed many rotten roots or repotted a cactus or succulent into dry mix, wait a few days before watering. Damaged roots need time to dry and recover, and immediate watering can make rot worse. For these plants, follow their usual low-water routine rather than treating them like a thirsty tropical plant.
After the first watering, do not water again on a schedule. Check the soil with your finger and let the top layer dry according to your plant's needs. Fresh potting mix may hold water differently than the old soil, so your previous routine may need a small adjustment.
Give Your Plant a Gentle Recovery Period
Repotting can cause a little stress even when everything goes well. Your plant may droop slightly, pause growth, or shed one older leaf while it adjusts. Place it in bright, indirect light for the first week or two, away from strong afternoon sun, air-conditioning vents, and cold drafts.
Skip fertilizer for about four to six weeks. Fresh potting mix often contains nutrients, and feeding too soon can irritate roots that are still recovering. Hold off on pruning, propagating, or moving the plant repeatedly as well. A quiet, stable spot is one of the best forms of aftercare.
If leaves turn yellow or the plant looks unhappy, resist the urge to water more right away. Check whether the soil is too wet, whether the pot drains properly, and whether the plant is getting the light it needs. Most repotting problems come from excess water, not from a lack of it.
Common Repotting Mistakes to Avoid
The most common mistake is choosing a pot that is far too big. It may look dramatic, but the extra wet soil can be difficult for a small root system to manage. Another frequent issue is using garden soil indoors. It can become compacted in containers and may bring in insects or pathogens.
Avoid adding a layer of rocks to the bottom of a pot to improve drainage. Water does not drain better this way. Instead, it can collect above the rock layer where roots are growing. A pot with drainage holes and the right soil mix is the more reliable solution.
It is also wise to avoid repotting a plant that is already struggling from pests, severe dehydration, or a major light change unless root rot or a broken pot makes it necessary. Stabilize the underlying issue first when possible. Repotting is helpful care, but it is not a cure for every plant problem.
Make Repotting Part of Your Plant Care Routine
A quick root check each spring can prevent surprises and help you plan ahead for larger plants. Keep a note of when you repot, what soil you used, and whether the plant moved to a larger pot or simply received fresh mix. This is especially useful when you care for several plants with different watering needs.
The right pot, soil, and simple tools can make plant care feel less like a chore and more like a small home upgrade. Plants House makes it easy to find indoor plants, planters, soils, and practical care essentials for the next time a favorite plant is ready for more room. Take your time, handle the roots gently, and let your plant settle into its refreshed space at its own pace.